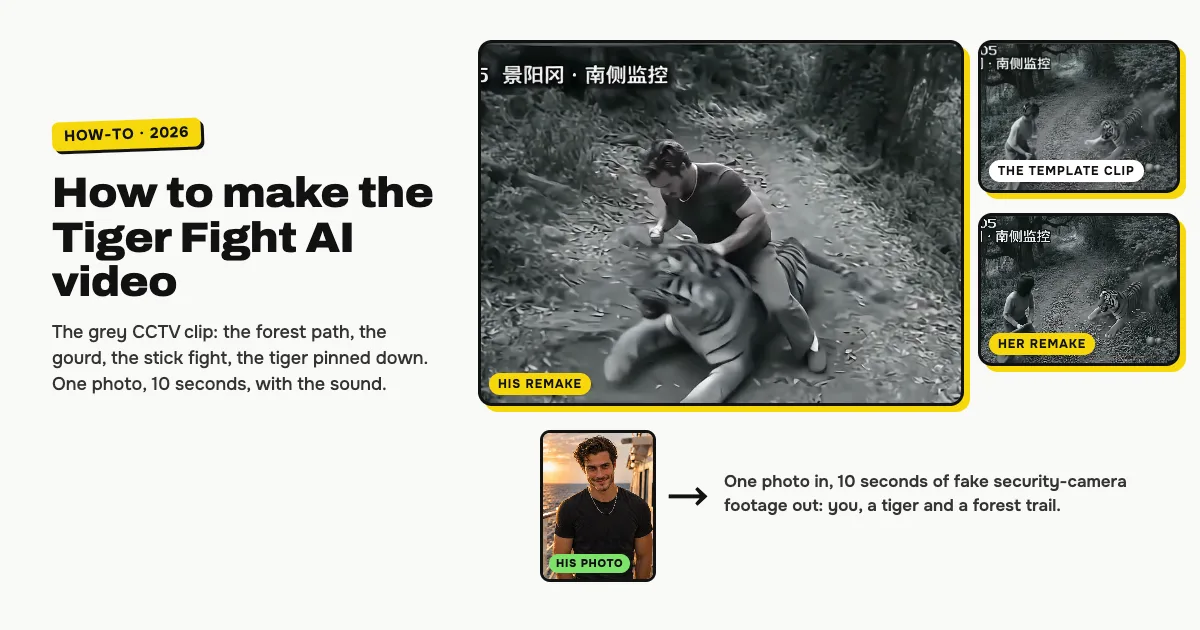
Short answer: open the Tiger Fight AI template on ClipRemake, add one clear photo of yourself and press Remake this. About five minutes later you download a 10-second, 4:3 MP4 that looks like grey security-camera footage: you walk up a forest trail, throw a gourd at a tiger, beat it back with a stick, and a second camera shows you holding it down. The phonk sound is already on it and there is no watermark. One video costs $9.99, and there is no free version.
What is the Tiger Fight AI trend?
Tiger Fight AI started as a CapCut template that blew up on Burmese TikTok in November 2026 under the caption "ကျားရိုက် AI Trend", roughly "tiger-beating AI trend". On November 9 and 10, posts showing how to make it passed half a million plays each, and one went past a million in a day.
The clip fakes footage from a forest camera. Its corner label names Jingyang Ridge, the hill where the hero Wu Song kills a tiger with his fists in the Chinese classic Water Margin. The joke is the same as in the old story: an ordinary person on a walk, a tiger, and the person wins.
Who can be in it
One adult: you. Your face, hair and clothes come from your photo, shown in grey like the rest of the footage. It is made for people only, and the tiger is AI too.
How to make the Tiger Fight AI video, step by step
Step 1: Add your photo
Go to the Tiger Fight AI page and tap the photo box (1). Choose a clear photo of yourself.
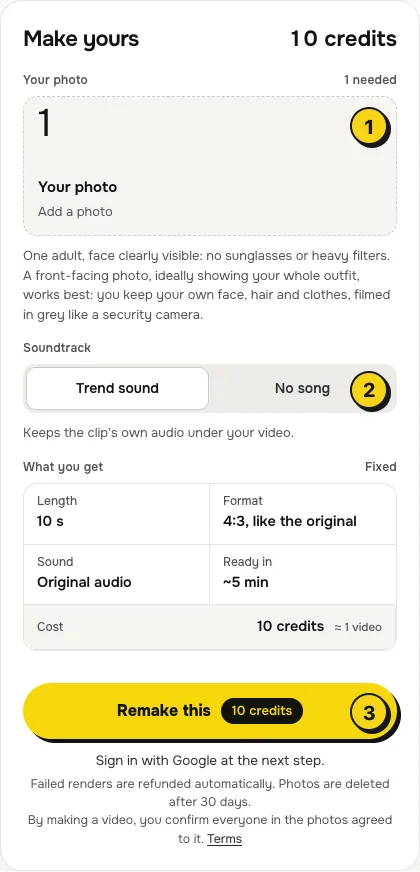
- Face to the camera. The security camera is high and far away, so a sharp, front-facing face is what makes the clip look like you.
- Show the outfit. A photo that shows what you are wearing, down to the shoes if you can, gives you that outfit on the footage.
- Just you. One person in the photo, no sunglasses or heavy filters.
Step 2: Choose the sound
The switch (2) has two settings:
| Setting | What you get | When to pick it |
|---|---|---|
| Trend sound (default) | The template's 10 seconds of phonk under your video | You want to post it as it is |
| No song | A silent MP4 | You will pick a sound inside TikTok or Reels |
Step 3: Press Remake this
Press Remake this (3). If you are not signed in, you sign in with Google first. With no credits yet, you choose a pack: one video is $9.99 (10 credits), and bigger packs and plans cost less per video. Pay by card, Apple Pay or Google Pay. If a render fails, the credits come back on their own.
Step 4: Download and post
About five minutes later the video waits in My videos. Download the MP4 (10 seconds, 4:3, 480p, no watermark) and turn on the AI-generated label when you post.
What your video looks like, second by second
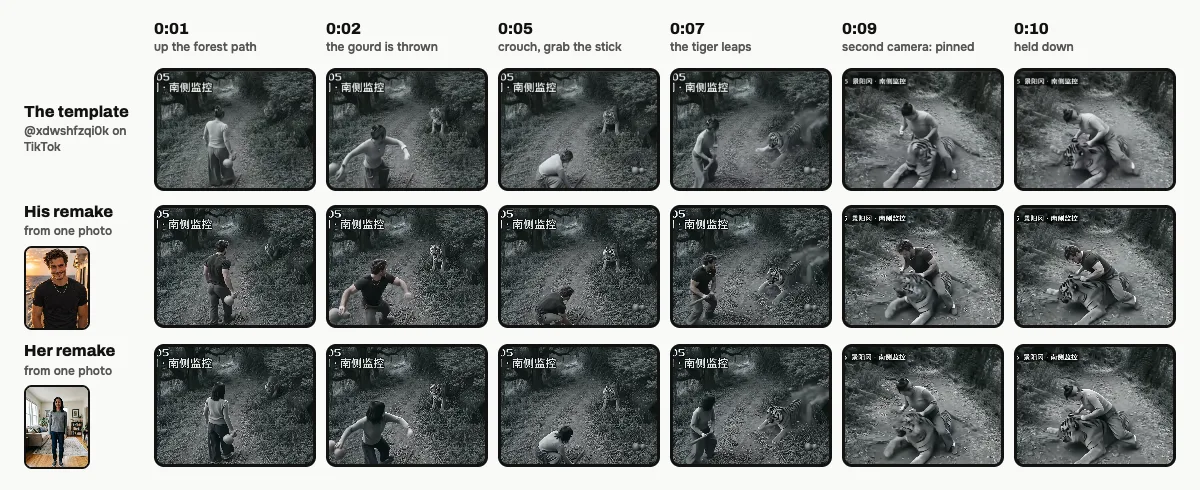
The camera angles, the tiger and every move come from the template clip. Only the person changes:
| Time | What happens |
|---|---|
| 0:00–0:02 | You stroll up the dirt trail with a round gourd; a tiger shows up in the bushes on the right |
| 0:02–0:04 | You turn, throw the gourd at it and step back to watch |
| 0:04–0:05 | You drop into a crouch and pick up a stick |
| 0:05–0:08 | The tiger springs at you and you fight it off with the stick |
| 0:08–0:10 | Cut to a lower camera: you kneel on the tiger and keep it pinned to the ground |
Small moments can change from one render to the next. On the closer camera at the end, details such as a hairstyle can come out a little different from your photo.
Why it is grey and 4:3
The trend pretends to be real CCTV, so your file keeps the security-camera look: black and white, grainy, slightly soft, in the boxy 4:3 frame of the template. TikTok, Reels and Shorts letterbox it top and bottom, the way the viral posts look. Cropping it to vertical would cut the tiger out of the wide shots.
Tips for a better result
- Good light on your face. A bright, sharp photo survives the grain best.
- Clothes with contrast. Dark on light or light on dark reads well in grey; an all-grey outfit can blend into the path.
- Keep the phonk. The hits land on the beat; if an app mutes reused audio, make the No song version and add the sound in the app.
Is it free?
No. Every video is a real render that costs money to make, so there is no free version, free trial or watermarked preview. One video costs $9.99, the pricing page lists packs and plans that cost less per video, and failed renders are refunded in credits automatically. Unused packs bought by mistake can be refunded under the refund policy.